
Setting up Google Analytics 4 can be daunting and tedious, especially if you’re new to Google Analytics. Having a detailed GA4 set-up checklist at your disposal is important for a perfect analytics account.
That’s why we'll discuss the 10 points that you definitely need when creating your Google Analytics account today in this article. You will understand all the critical steps that you must accomplish to create effective analytical data collection from your sources is important.
So, let’s dive right into the 10-point checklist for setting up your Google Analytics 4:
GA4 Set-up Checklist: 10 points that you should consider
Create a new Analytics account
Your first point in your checklist is ensuring you have the correct analytics account for your apps or websites. This step is necessary if you do not already have a Google Analytics account; or if you want to use a different account for other apps or websites.
To create a new Analytics account, sign in to your Google Analytics account. Then, find the gear icon or Admin at the bottom left of your Google Analytics dashboard to access your analytics administrative features. If you’ve previously used Universal Analytics and accessed this Admin page, it might differ slightly from the GA4 admin page.
After you’ve accessed your admin page, click Create account under the Accounts column. Provide a name and configure the data you wish to share with Google for analytics. This data configuration gives you more control over the data you collect from your websites, mobile apps, and other digital devices with analytics.
Once you’re done, click Next to add the new account.
Set up a new Google Analytics 4 Property
The second step you must follow when creating a Google Analytics 4 is creating a Google Analytics 4 property. So, how do you do that? First, you must access your Admin page in Google Analytics when you have an editor role to have GA4 properties in Google Analytics.
And to access the Admin page on your Google Analytics, click on Admin or the gear icon at the bottom left of your dashboard. On the Admin page, find the Properties column and click Create property.
Next, on the Create New Property page, provide the property name, like “My Business Website Data,” and configure your reporting time and currency. The reporting time is crucial, especially because your audience will access your site at different timezones, giving you reporting time consistency. Remember, you can change these settings later.
Once you’re done, click Next to select your industry category, provide your business information, and share details about how you will use Google Analytics in your business. Finally, click Create and accept the terms of service and the data processing amendment to complete your new GA4 property setup.
Read More: What You Should Know About The New GA4 Data API and UA Property API
Add your data streams
For every new GA4 property, you must set up data streams for your website, iOS app, or Android app. And so another important item in a GA4 set-up checklist is setting up data streams. Data streams are different analytics data sources you will use to collect your data, such as websites or apps.
After successfully setting up a new GA4 property, click on Data Streams on your Properties column on the Admin page, then Add Stream. You can add a website, iOS app, or Android app. Also, you can add several data streams to the list for this property.
Added data streams will show up on the data streams page, where you can click on each to view and update the stream details. You can also toggle the Enhanced measurement feature on this page, create custom events, modify events, configure tag settings, and more.
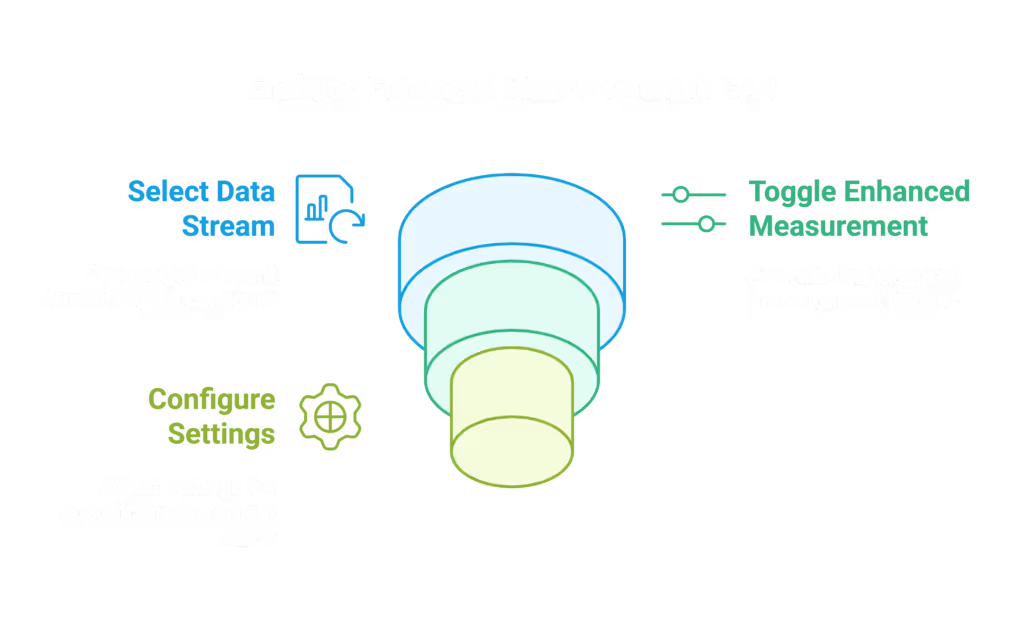
Enable enhanced measurement on your data streams
One of the features that you can easily forget or ignore when setting up your GA4 account is Enhanced Measurement. Enhanced measurement for data streams in Google Analytics allows you to collect detailed user interaction and content analytics from your sites in addition to the standard page view measurement.
And to enable Enhance Measurement for your Data Streams, Go to Data Streams on your properties’ column, click on your data stream, and then click the toggle to enable Enhanced Measurement. You can configure more settings by clicking the gear icon and following the prompts to configure the enhanced measurement feature.
Enabling this feature for all your data streams allows you to automatically measure all the crucial events about how users interact with your content on your website. This feature can collect data from diverse on-page elements whenever a user’s interaction triggers the relevant events.
For example, you can collect diverse events about your links or embedded videos on your site. That way, you’ll better view your users from specific angles, giving you invaluable insights into your customer’s behaviour and how you can improve your site to provide better experiences.
Create or modify conversions events
Once you have enabled Enhanced Measurement for your data streams, conversion events are another feature you should consider in your GA4 set up. Thankfully, you can easily set up conversion tracking in Google Analytics 4. Conversions tracking allows you to measure and analyze user actions on your website that lead to specific goals or outcomes.
However, events that you track do not always measure what you want as conversions. Thus, you must either create new events to define your conversion events or modify existing events or create new events from existing events to match your conversion goals. That way, you can still gain the insights you need without modifying your app to track custom events on your site.
Read More: How To Import Data From Google Universal Analytics Into BigQuery
How to create new conversion events
Modifying events overwrites it across your site or app, so it is generally not the best idea unless it is crucial. And so, to create new conversion events and set conversion tracking for your apps and websites, you should follow the steps below:
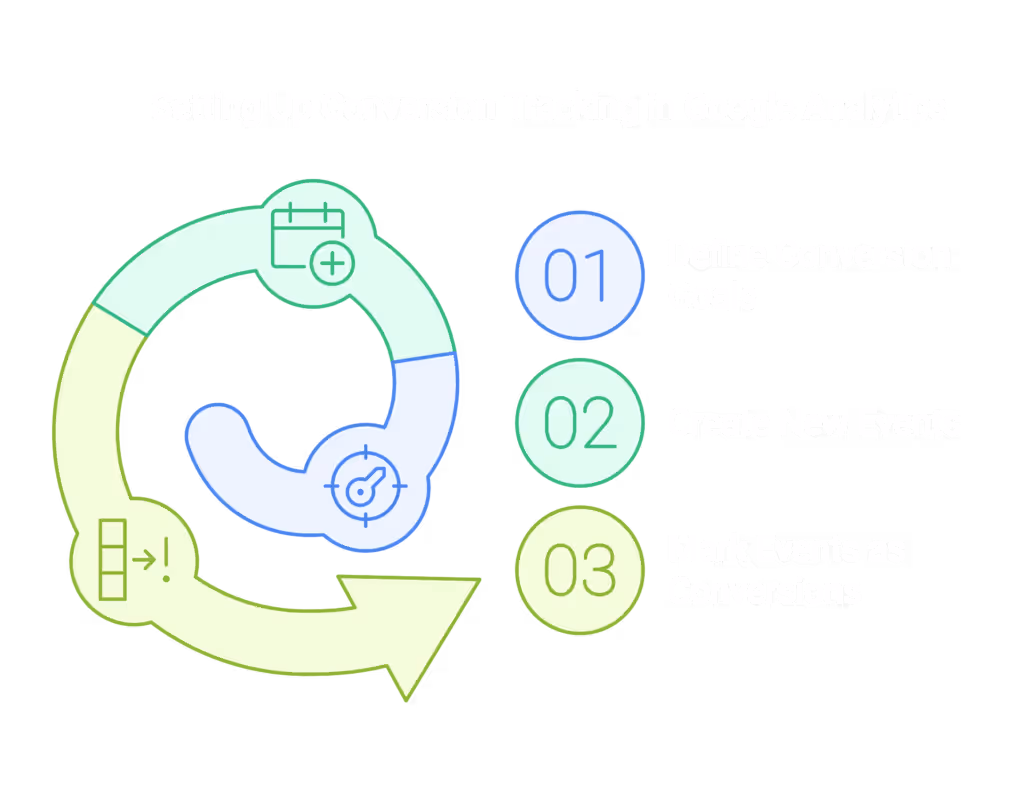
- Define your conversion goals and the events that can trigger them on your site or app. You must define what events you want to track that will count as conversions. Knowing the actions that you want your users to take helps you understand the events that represent these actions in Google Analytics. These events could be a form submission, a purchase, a video view, etc.
- Next, create new events from existing events or from scratch to represent your conversion goals. To create a new event in Google Analytics 4, go to the Events section in your properties column. Configure the event's parameters like the name, matching condition, conditions, parameters, etc. You must create relevant parameters for your conversion events to ensure that you will collect the correct insights from your site.
- Mark the new event as a conversion. In Google Analytics, under the properties tab of the admin page, click on Conversions, then New conversion event. Finally, enter the name of the new event and click Save.
Once your conversion tracking is up and running, you can monitor and analyze your conversion data to gain insights into your users’ behaviour and optimize your website for better performance. Use your Google Analytics real-time reports to monitor how the new conversion events are performing and modify them if necessary.
Set up eCommerce events tracking
Google Analytics does not automatically collect eCommerce data from your site or app because eCommerce data often requires more context, e.g., adding parameters to your eCommerce events to make them more meaningful. Therefore, you must add eCommerce events to your website or app to collect your eCommerce data. Alternatively, you can add it directly to your Google Tag Manager container.
It can be obvious, but you need to set up an eCommerce website before you can track eCommerce data in GA4. It simply means that to collect valuable eCommerce data, your site needs to have transactional functionality, such as adding items to a shopping cart, checkout, and completing a purchase.
Understanding how customers interact with your products and services will help you gain insights to optimize their shopping experiences. You can see what impacts your conversions the most, what changes can improve your onsite promotions and more.
Once you have set up eCommerce tracking, you can access the eCommerce reports in Google Analytics. You can view eCommerce metrics and dimensions about your transactions, products, revenue, and more directly from your dashboard or through the API.
To view your reports in Google Analytics, go to the Ecommerce section of your dashboard and select the report to gain valuable insights into your online store’s performance and customer behaviour.
Define new or custom audiences
Audiences in Analytics are users with similar demographics, behaviours, or other descriptive data. Google Analytics will automatically generate two audiences that address common use cases. They include all users, those who have ever launched your app or visited your website, and purchases, those who have completed a purchase in your site or app.
Additionally, Analytics can generate predictive audiences to build predictive metrics for your GA4 properties automatically if you collect the required data types and amounts. These audiences may include likely 7-day churning purchases and users, purchases and first-time purchases, or 28-day top spenders.
All the above audiences will automatically be generated for you. But what if they don’t fit exactly to your needs? What if they are too broad or narrow for your campaign needs? That’s when you must define new, custom audiences of your own!
To do that, go to Audiences under your property column, and create the audience you want to target. You should create a condition based on the data you collect. Your condition should identify specific user characteristics you prefer to use to define a specific group of users.
And once you’ve defined your audiences, you can use them for remarketing, targeting, or personalization. That way, you ensure that your efforts provide the optimum impact while providing the best experiences for your users.
Create custom metrics and dimensions
Like other custom elements in Google Analytics, custom dimensions and custom metrics are those you create yourself. They allow you to collect and analyze analytics data that are not tracked automatically.
And to track additional data about your user’s interactions on your website or app, you must set up custom metrics or dimensions in your property. And to do that, go to your property column in Google Analytics and click Custom Definitions. Next, select Custom Dimensions or Custom Metrics to configure your new metric or dimension. You can view and add an index, a name, or other properties like scope and type.
More importantly, tick the active checkbox to start collecting data from your new metrics and dimensions. Finally, you must modify your tracking code to see the metrics on your report. You can use custom dimensions and metrics with advanced segments or as secondary dimensions in standard reports.
Ensure all Google Tags on your websites are updated
One of the most critical steps to a perfect GA4 set up is ensuring that you add and configure Google Tags correctly on your apps and websites. Google tag (gtag.js) allows you to send data from your website to Google for analytics and other Google Products and services.
To start collecting data from your website, you should put a Google tag into your website’s code. You must include it in all the pages you want to track or have the data you need to collect. You'll be notified on the Google Analytics tag page if you do not add or configure your Google tag. So, you can decide to create a new tag or connect to an existing Google tag.
Setting up your Google tag is one thing. Keeping it updated or having site-wide tagging is important to ensure that you get accurate analytics data. So, consider configuring your tag settings to manage automatic event detection, list unwanted referrals, define internal traffic, configure domains, and more.
Review your analytics data
Now that you’ve configured all you need to create a perfect Google Analytics 4 property, you must review your analytics reports to check if everything is running as expected. Check your default and the custom elements you’ve added to your account.
On the left-hand navigation on your Google Analytics dashboard, click Reports to access your apps and website analytics data. You can explore the reports available to check if you’ve set up your account correctly. You may need to redo the GA4 set-up if a report does not provide the expected data. If everything is as expected, you’re ready to analyze your website or app traffic and user behaviour.
To get the best test for tracking your analytics data, use the GA4 DebugView feature in Google Analytics. It measures real-time tracking data for all your websites or apps. You can keep monitoring and analyzing the data until you know you're collecting accurate analytics data. And if all your analytics features are working correctly.
Wrapping up
Once your Analytics is up, you can monitor and analyze your analytics data to gain insights into your users’ behaviour. You can also use it to optimize your website for better performance. You can use GA4’s reports to measure how diverse events perform over time. Analytics data from your site or app will help you make data-driven decisions based on your findings.
If you’ve followed this GA4 set-up checklist, you are confident you built a perfect analytics system. Analytics data are more valuable for all your sites, apps, or digital devices when accurate and more personalized. They will allow you to meet your analytics needs to take your business to the next level.
Lastly, to take your digital marketing reporting to the next level, consider using Dataslayer to import all your PPC/SEM data to Google Sheets, Google BigQuery, Looker Studio, and other BI tools.


